PROJECT
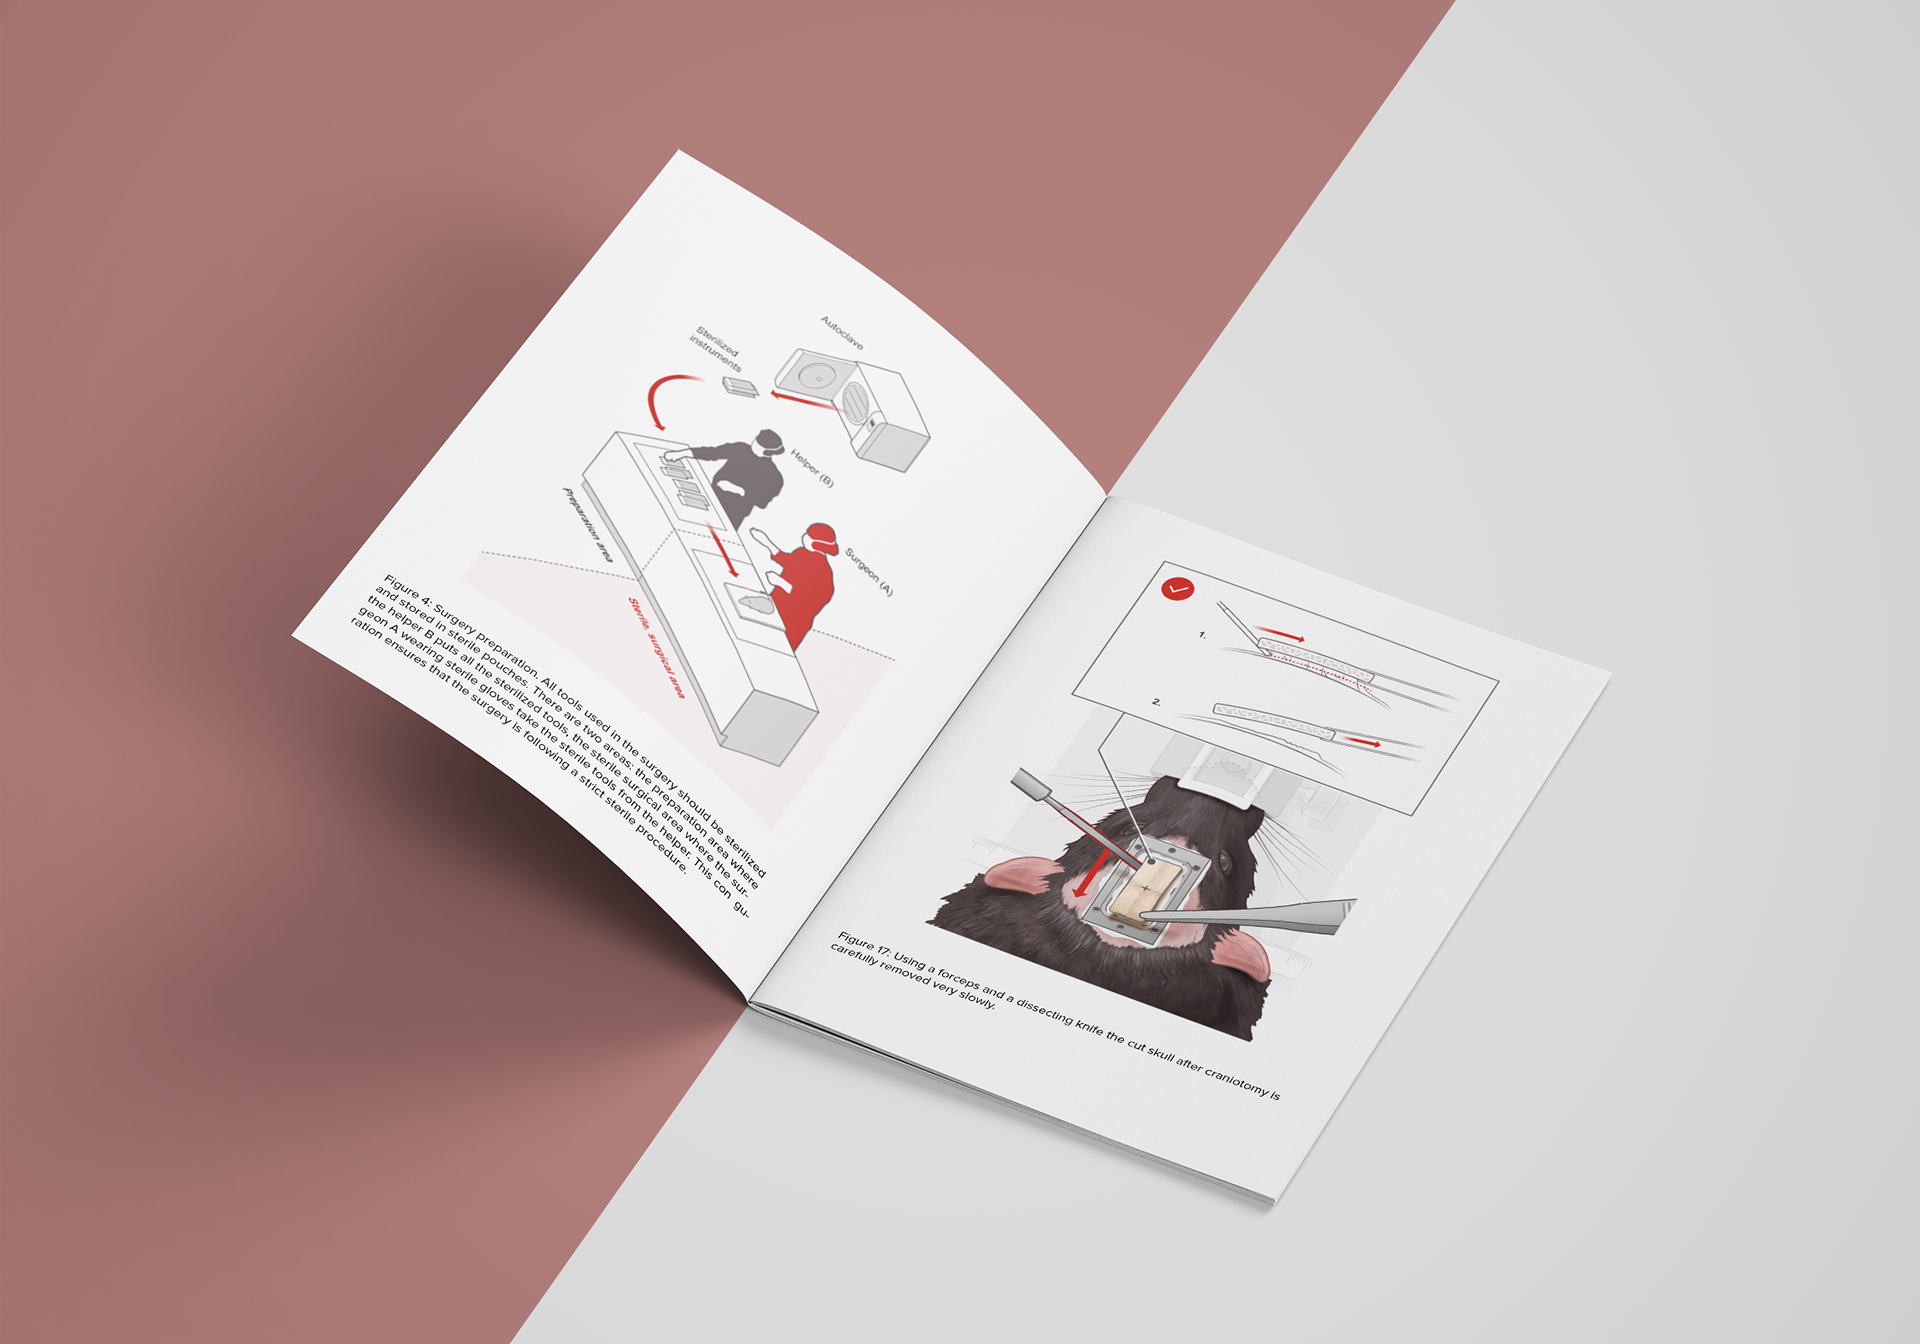
The goal of this project was to create a series of step-by-step illustrations on a complex surgical procedure for functional ultrasound imaging of rodents brain. These images were to be published in a very complete scientific publication describing the aforementioned surgical technique.
It was crucial to develop materials that could be easily understood by readers – mostly neuroscientists – ensuring the reproducibility of this technique as a research method. Therefore, we decided to create figures with two sections:
1. A semi-realistic section, using digital painting techniques to portrait the rodents with just enough detail, and using the same field of view the surgeon would have when performing this technique. All superfluous details were to be omitted.
2. A schematic section, using IKEA-inspired technical drawings to convey secondary information about correct assembly and positioning of materials, and measurements. Images needed to be as self-explanatory as possible.
Finally, since this was to be published in a scientific journal, we had to adhere to the figure guidelines, ensuring a smooth review and acceptance process. To increase accessibility, figures were also developed respecting the Web Content Accessibility Guidelines, and to work as greyscale materials.
Read the full publication here.
For the full list of figures see the supplementary materials here.
© Diogo Guerra. 2021
CLIENT
Associate Research Scholar,
Princeton Neuroscience Institute
Princeton University, US
TOOLS
Adobe Illustrator®
Adobe Photoshop®
TOPICS
#Rodent #Brain
#Neurosciences
#Neurology
#Surgery
#MedicalIllustration
#Sciart
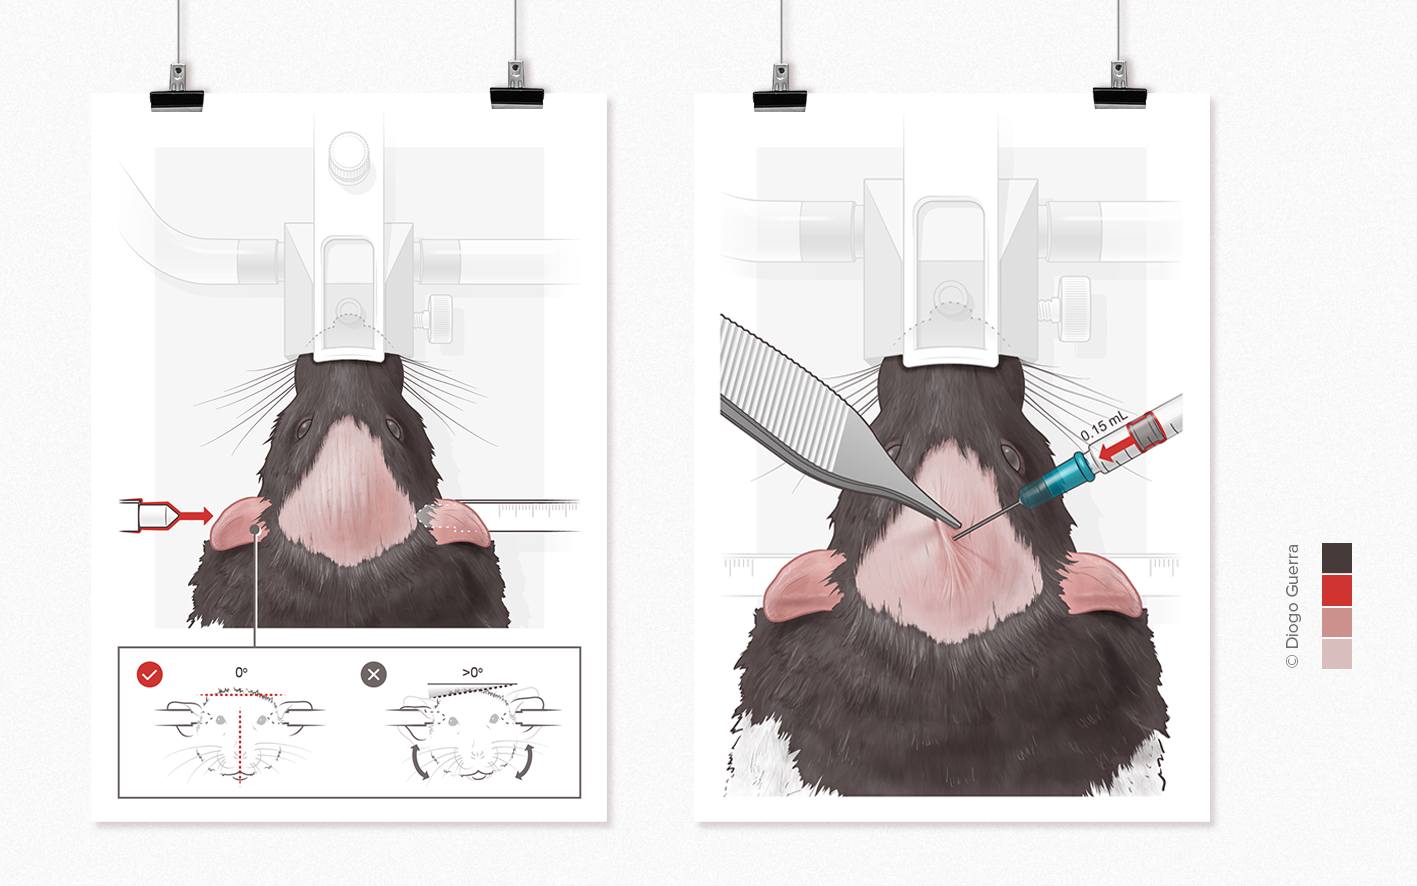
/ Some illustrations describing the preliminary preparation steps for the surgery. On the left, the ear bar insertion to stabilize the rat head. On the right, Lidocaine/Norepinephrine injection for anesthesia. Call-out windows are used to emphasize specific positioning of materials.
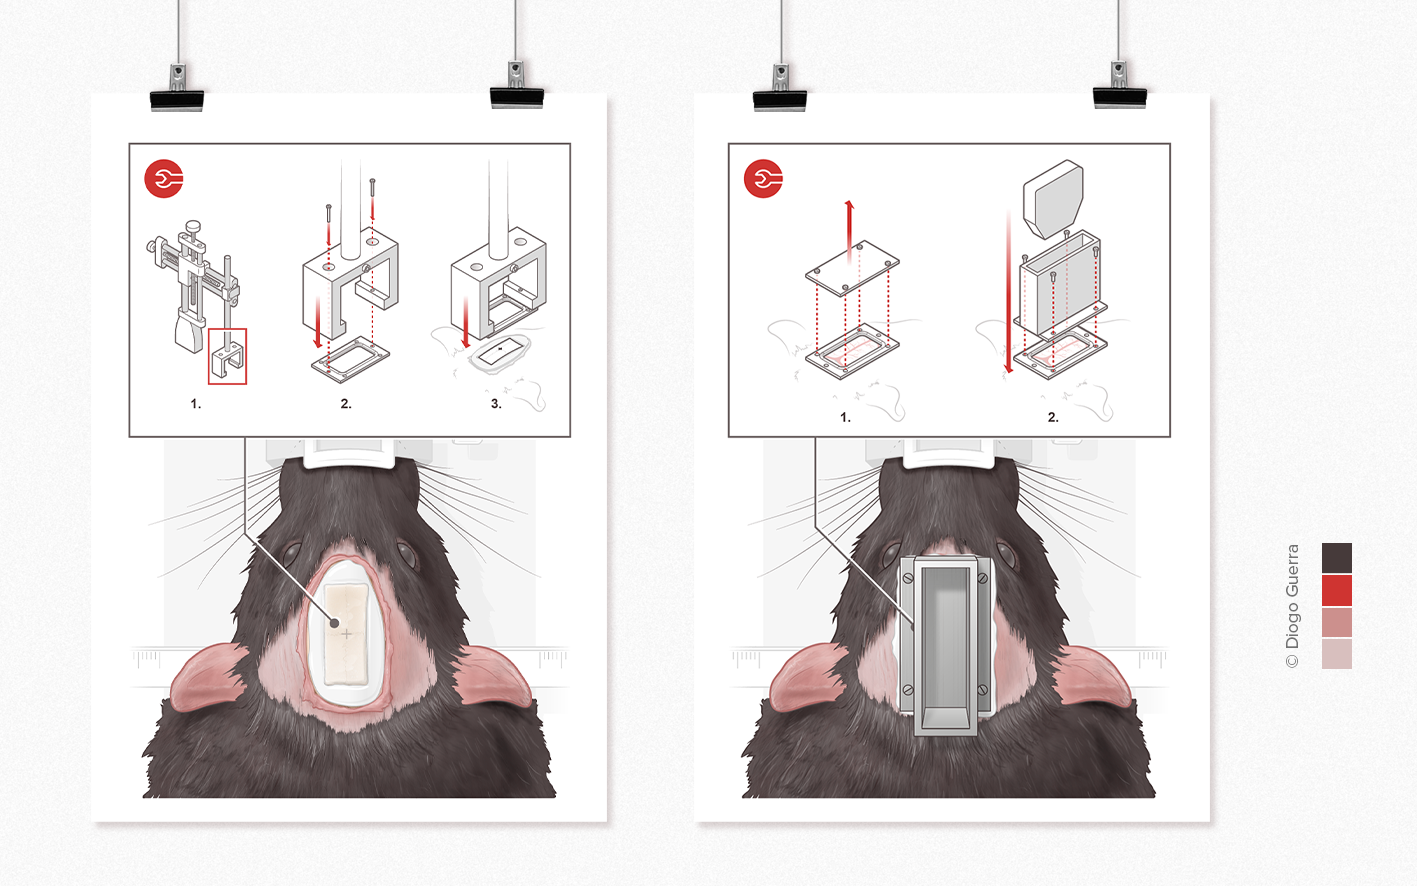
/ On the left, the headplate is screwed to the positioning device attached to the stereotaxic arm. Subsequently it is lowered and centered over the head area where with rectangular gel. On the right, the headcover is removed, and the probeholder attached to the headplate.
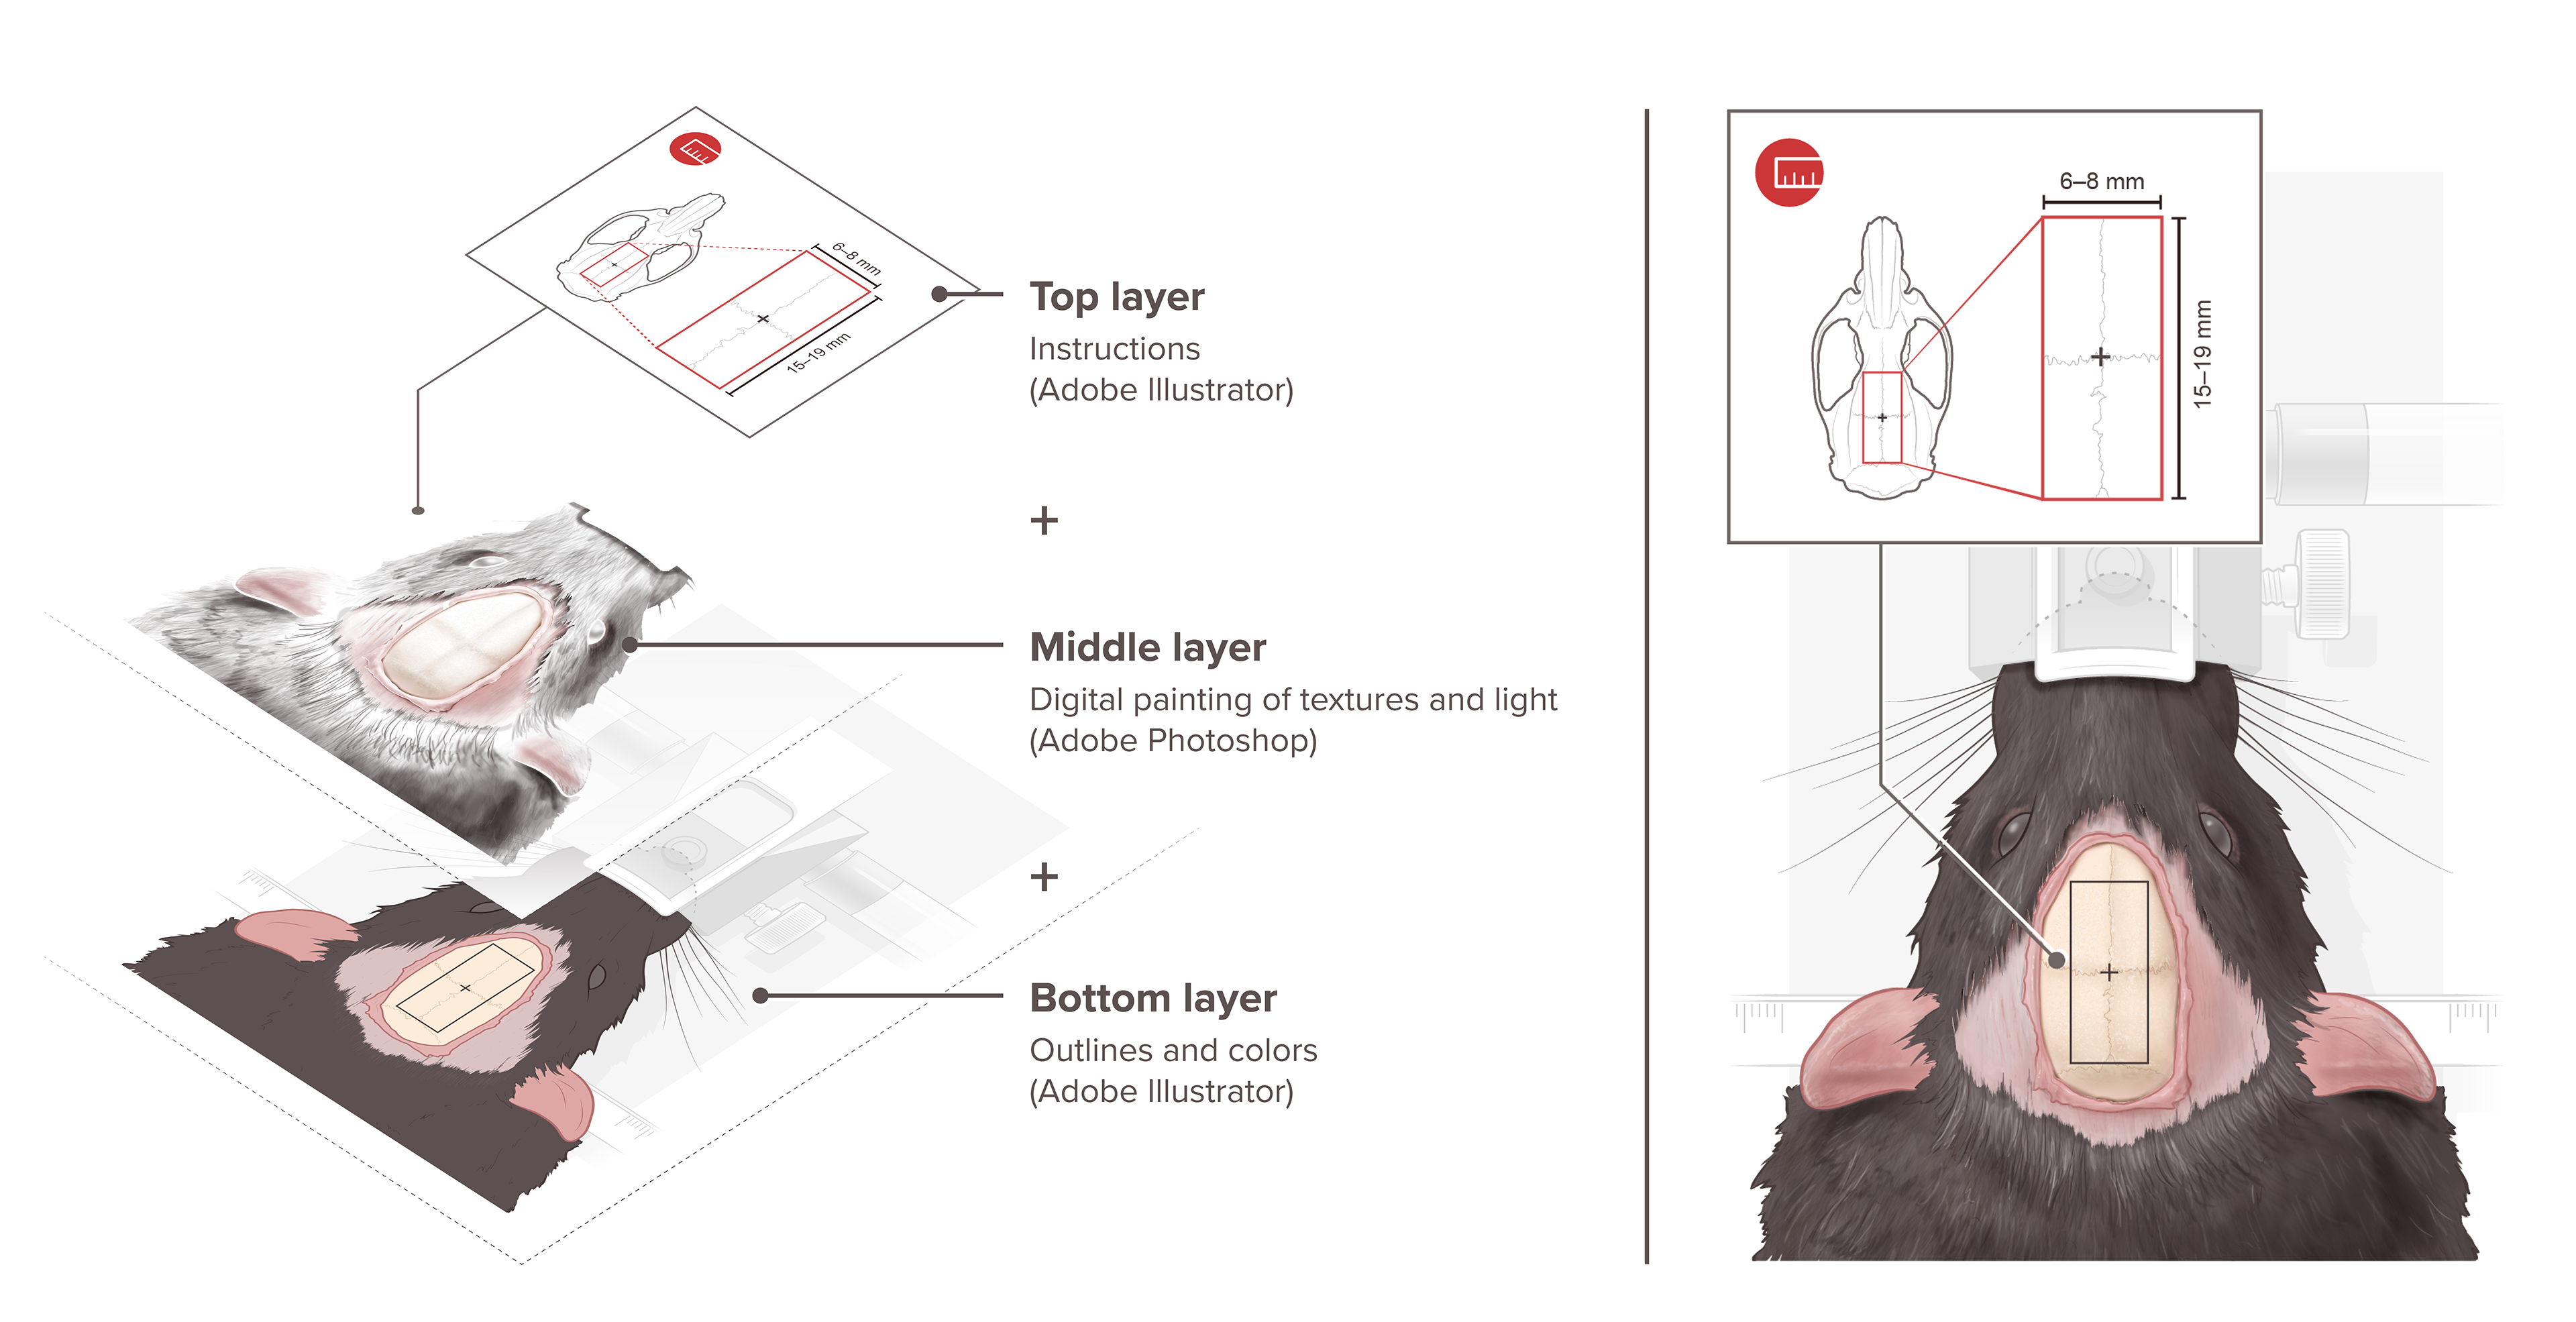
/ Example of how the several layers were built to achieve the final result – a mix of semi-realistic illustration with semi-schematic elements around it.
© Diogo Guerra. 2021